
The Agency Vista badge is awarded to companies that meet the highest standards of performance and service. If you've got a badge, it tells your customers and potential clients you’re among the best at what you do. This article shows you how to install the badge on your website and get verified on Agency Vista.
What is a verified badge?
We can all agree the digital agency landscape is a very saturated market right now - with everyone claiming they are an expert. With verification, we ensure all agencies’ experience and success are stamped with a seal of trust and confirmation.
How it works
To get verified with Agency Vista, the following steps are required after signing up for any agency profile:
2. Connect your agency social profiles
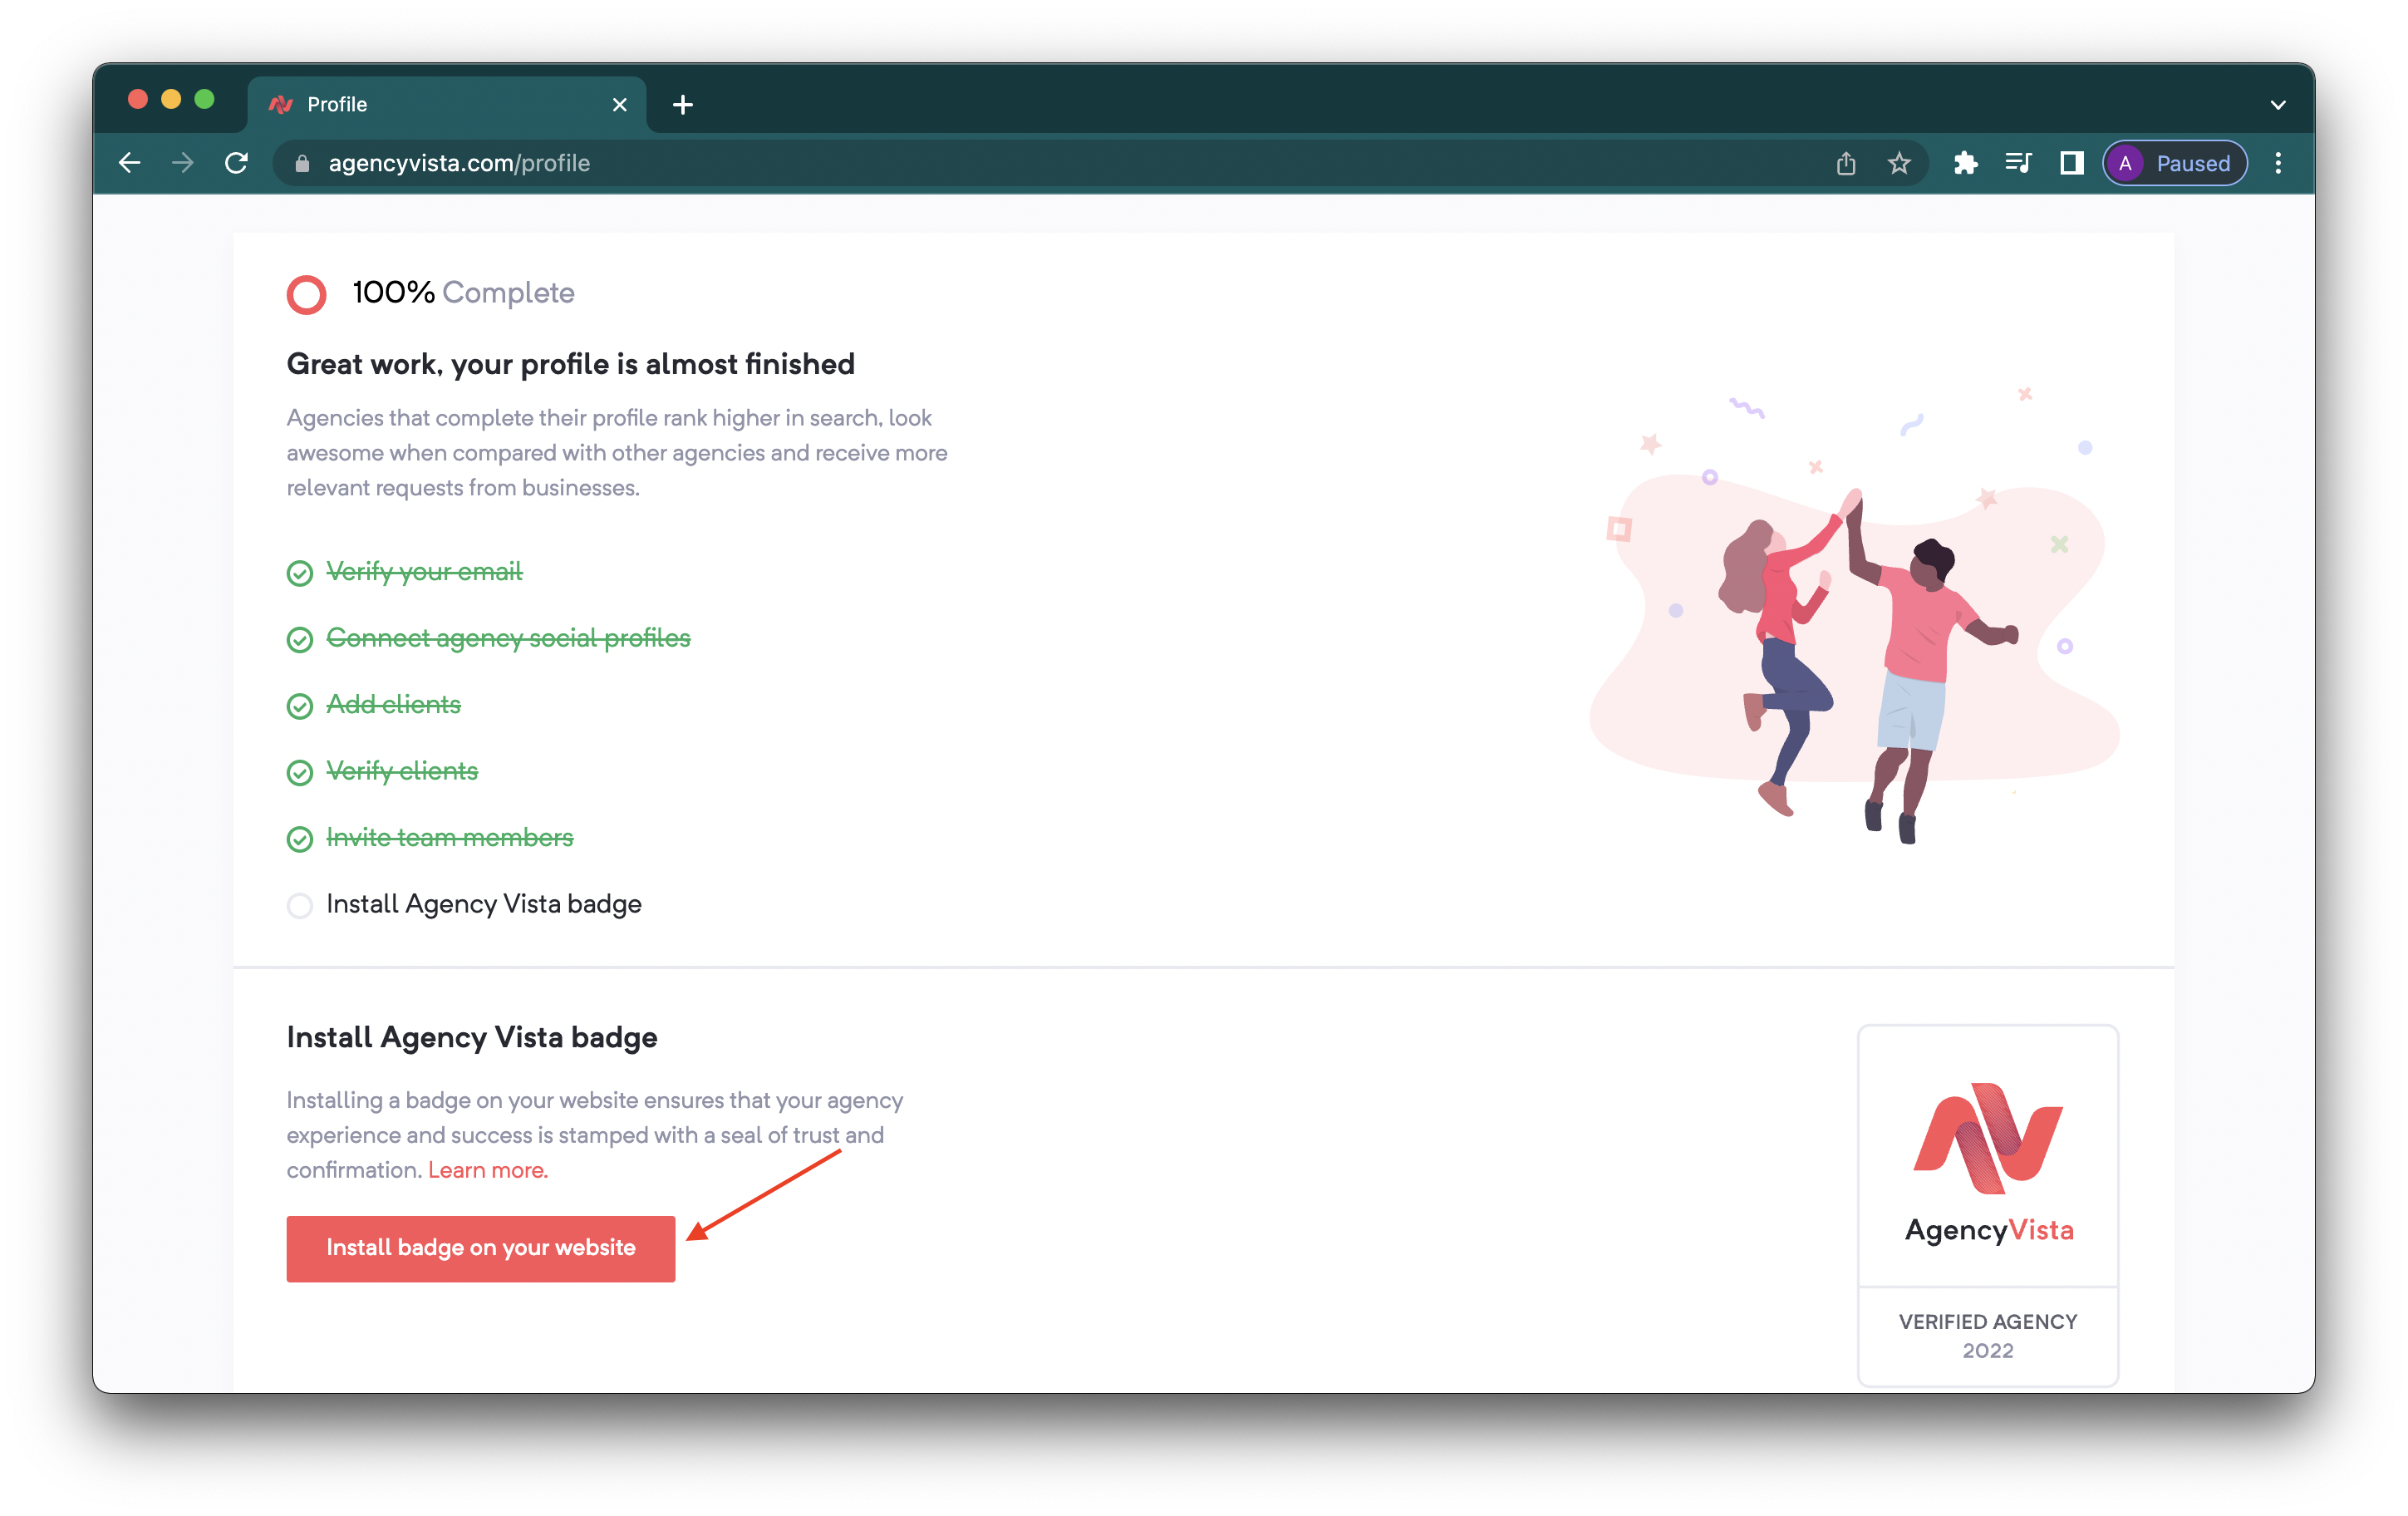
How to get the Verified Agency Badge
Note: To be able to install the Agency Vista badge you need to upgrade to a paid plan.
1. Login to your agency profile and on your main page, click the Install badge on your website.
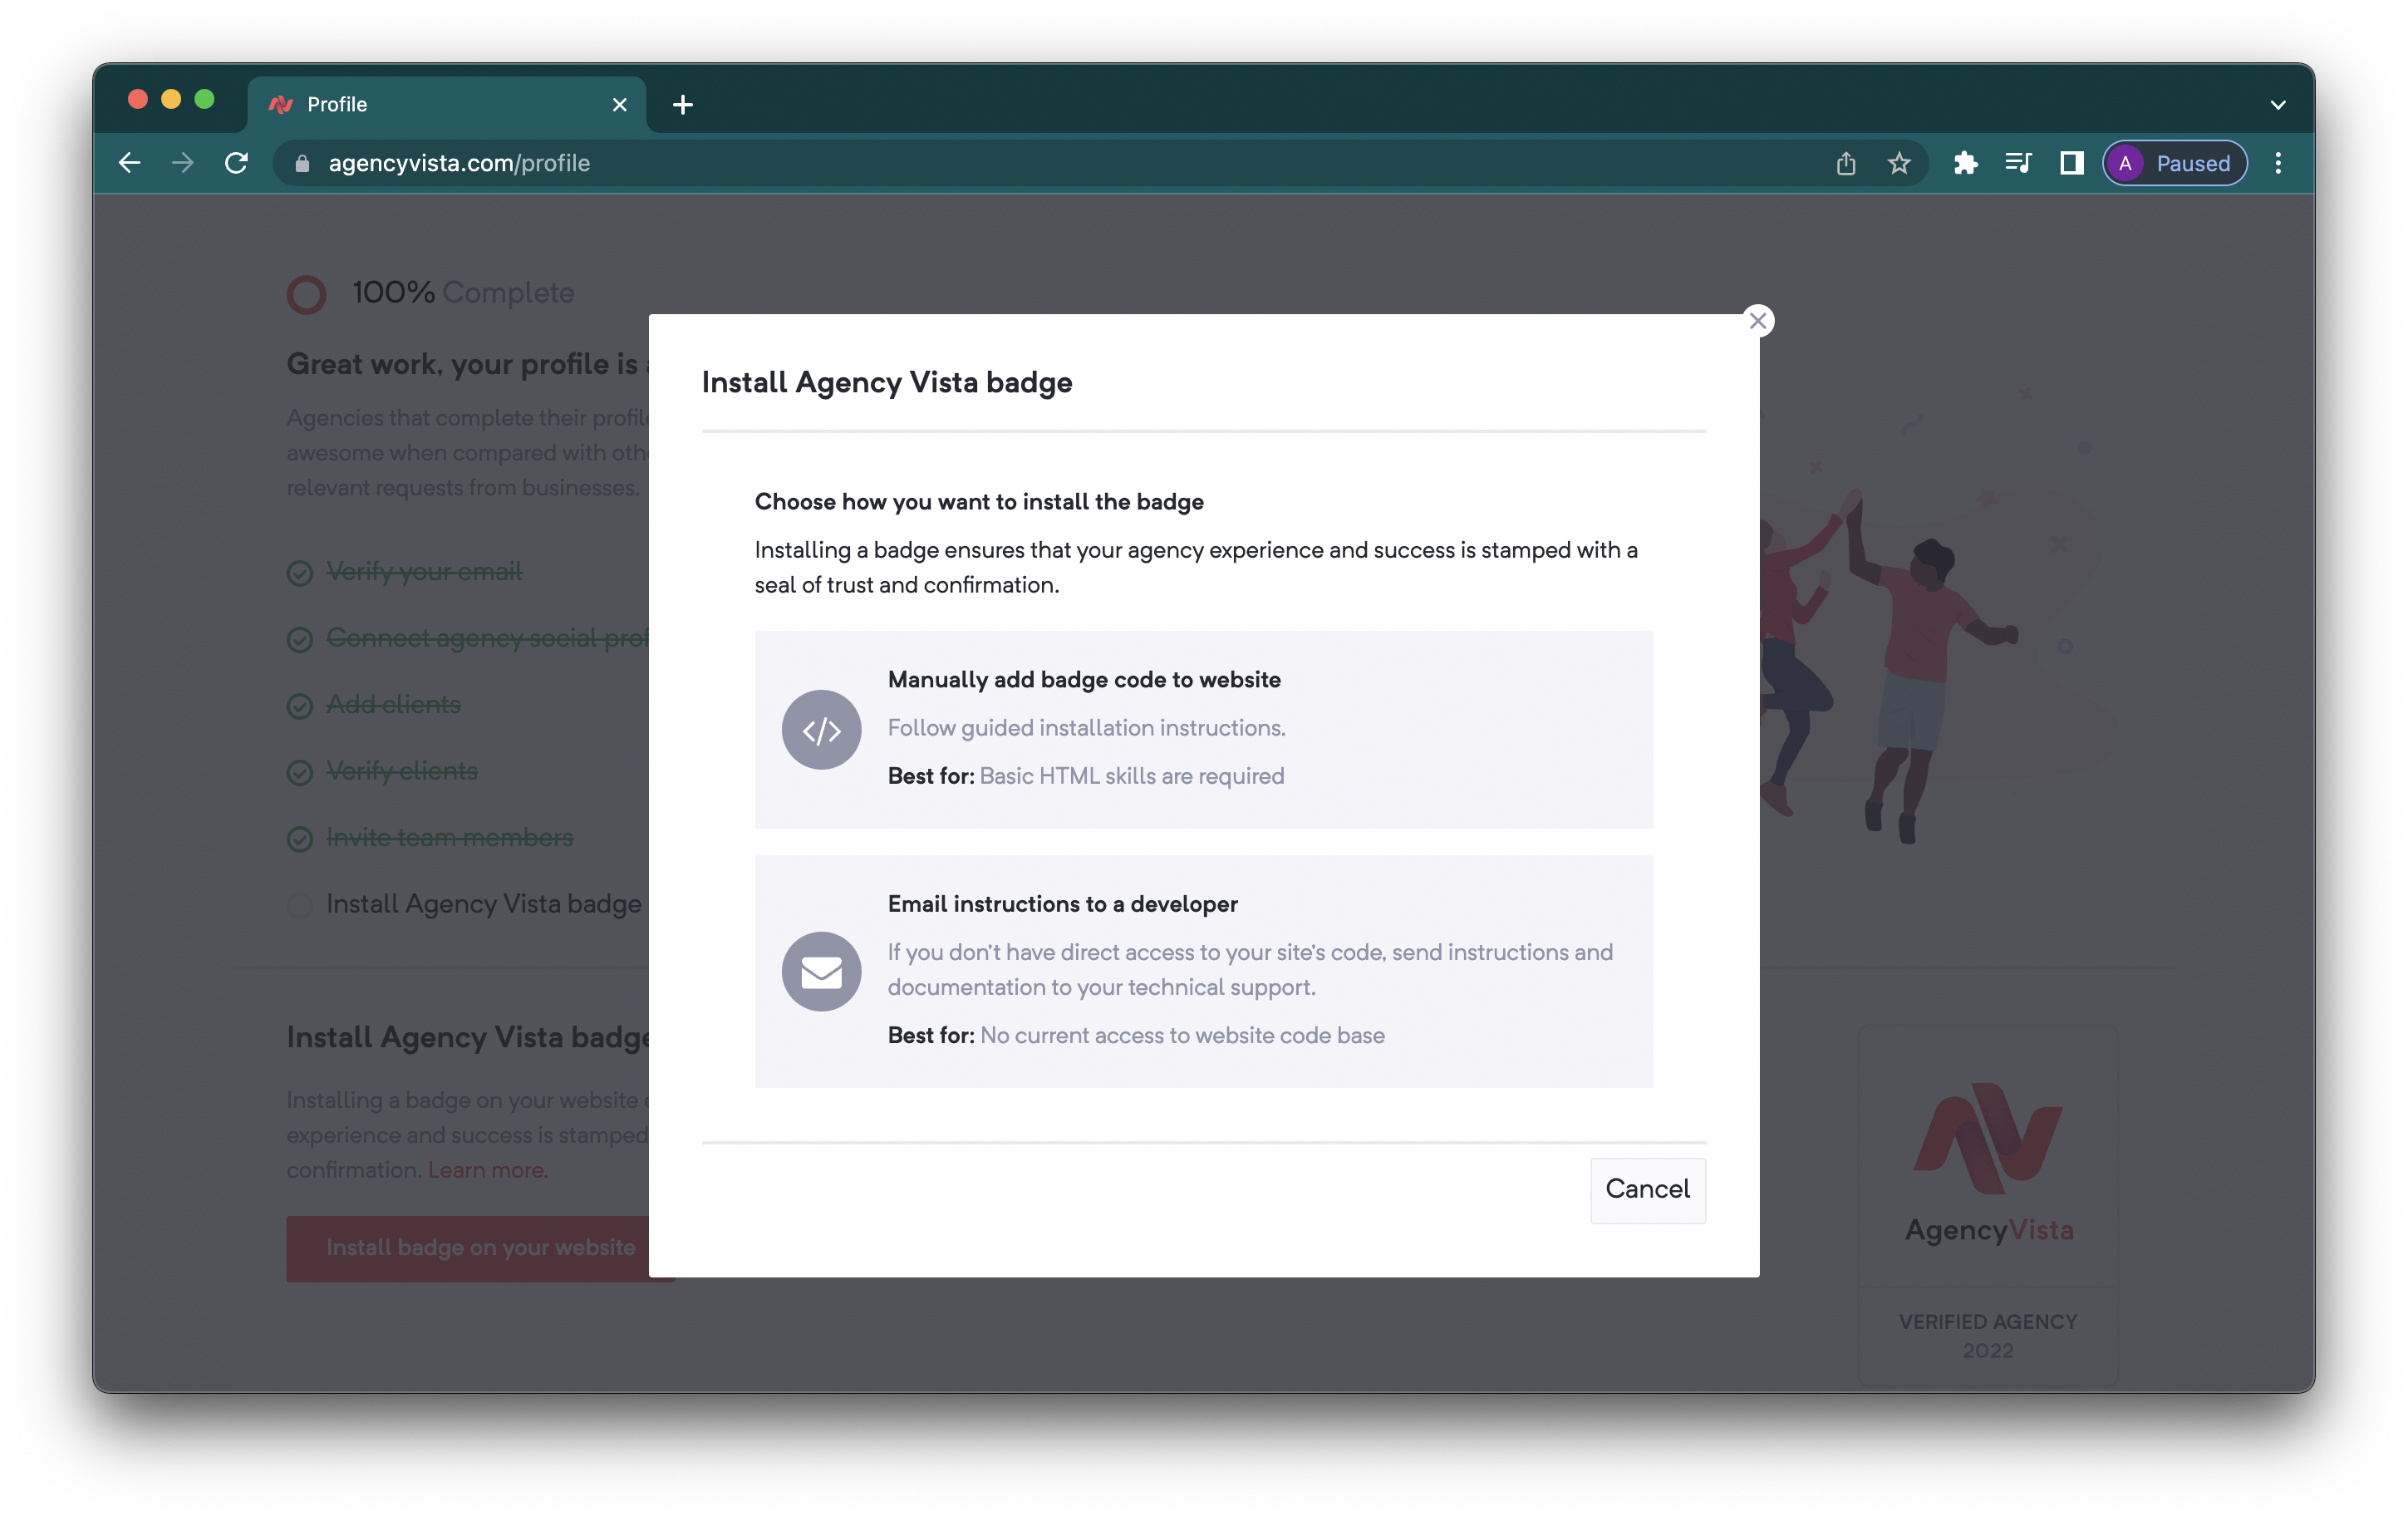
2. You have two ways to install the badge, manually by yourself or by emailing the instructions to your developer. Select the first option - Manually add badge code to website.
3. Click Copy to clipboard to copy the HTML code that you will add to your website. 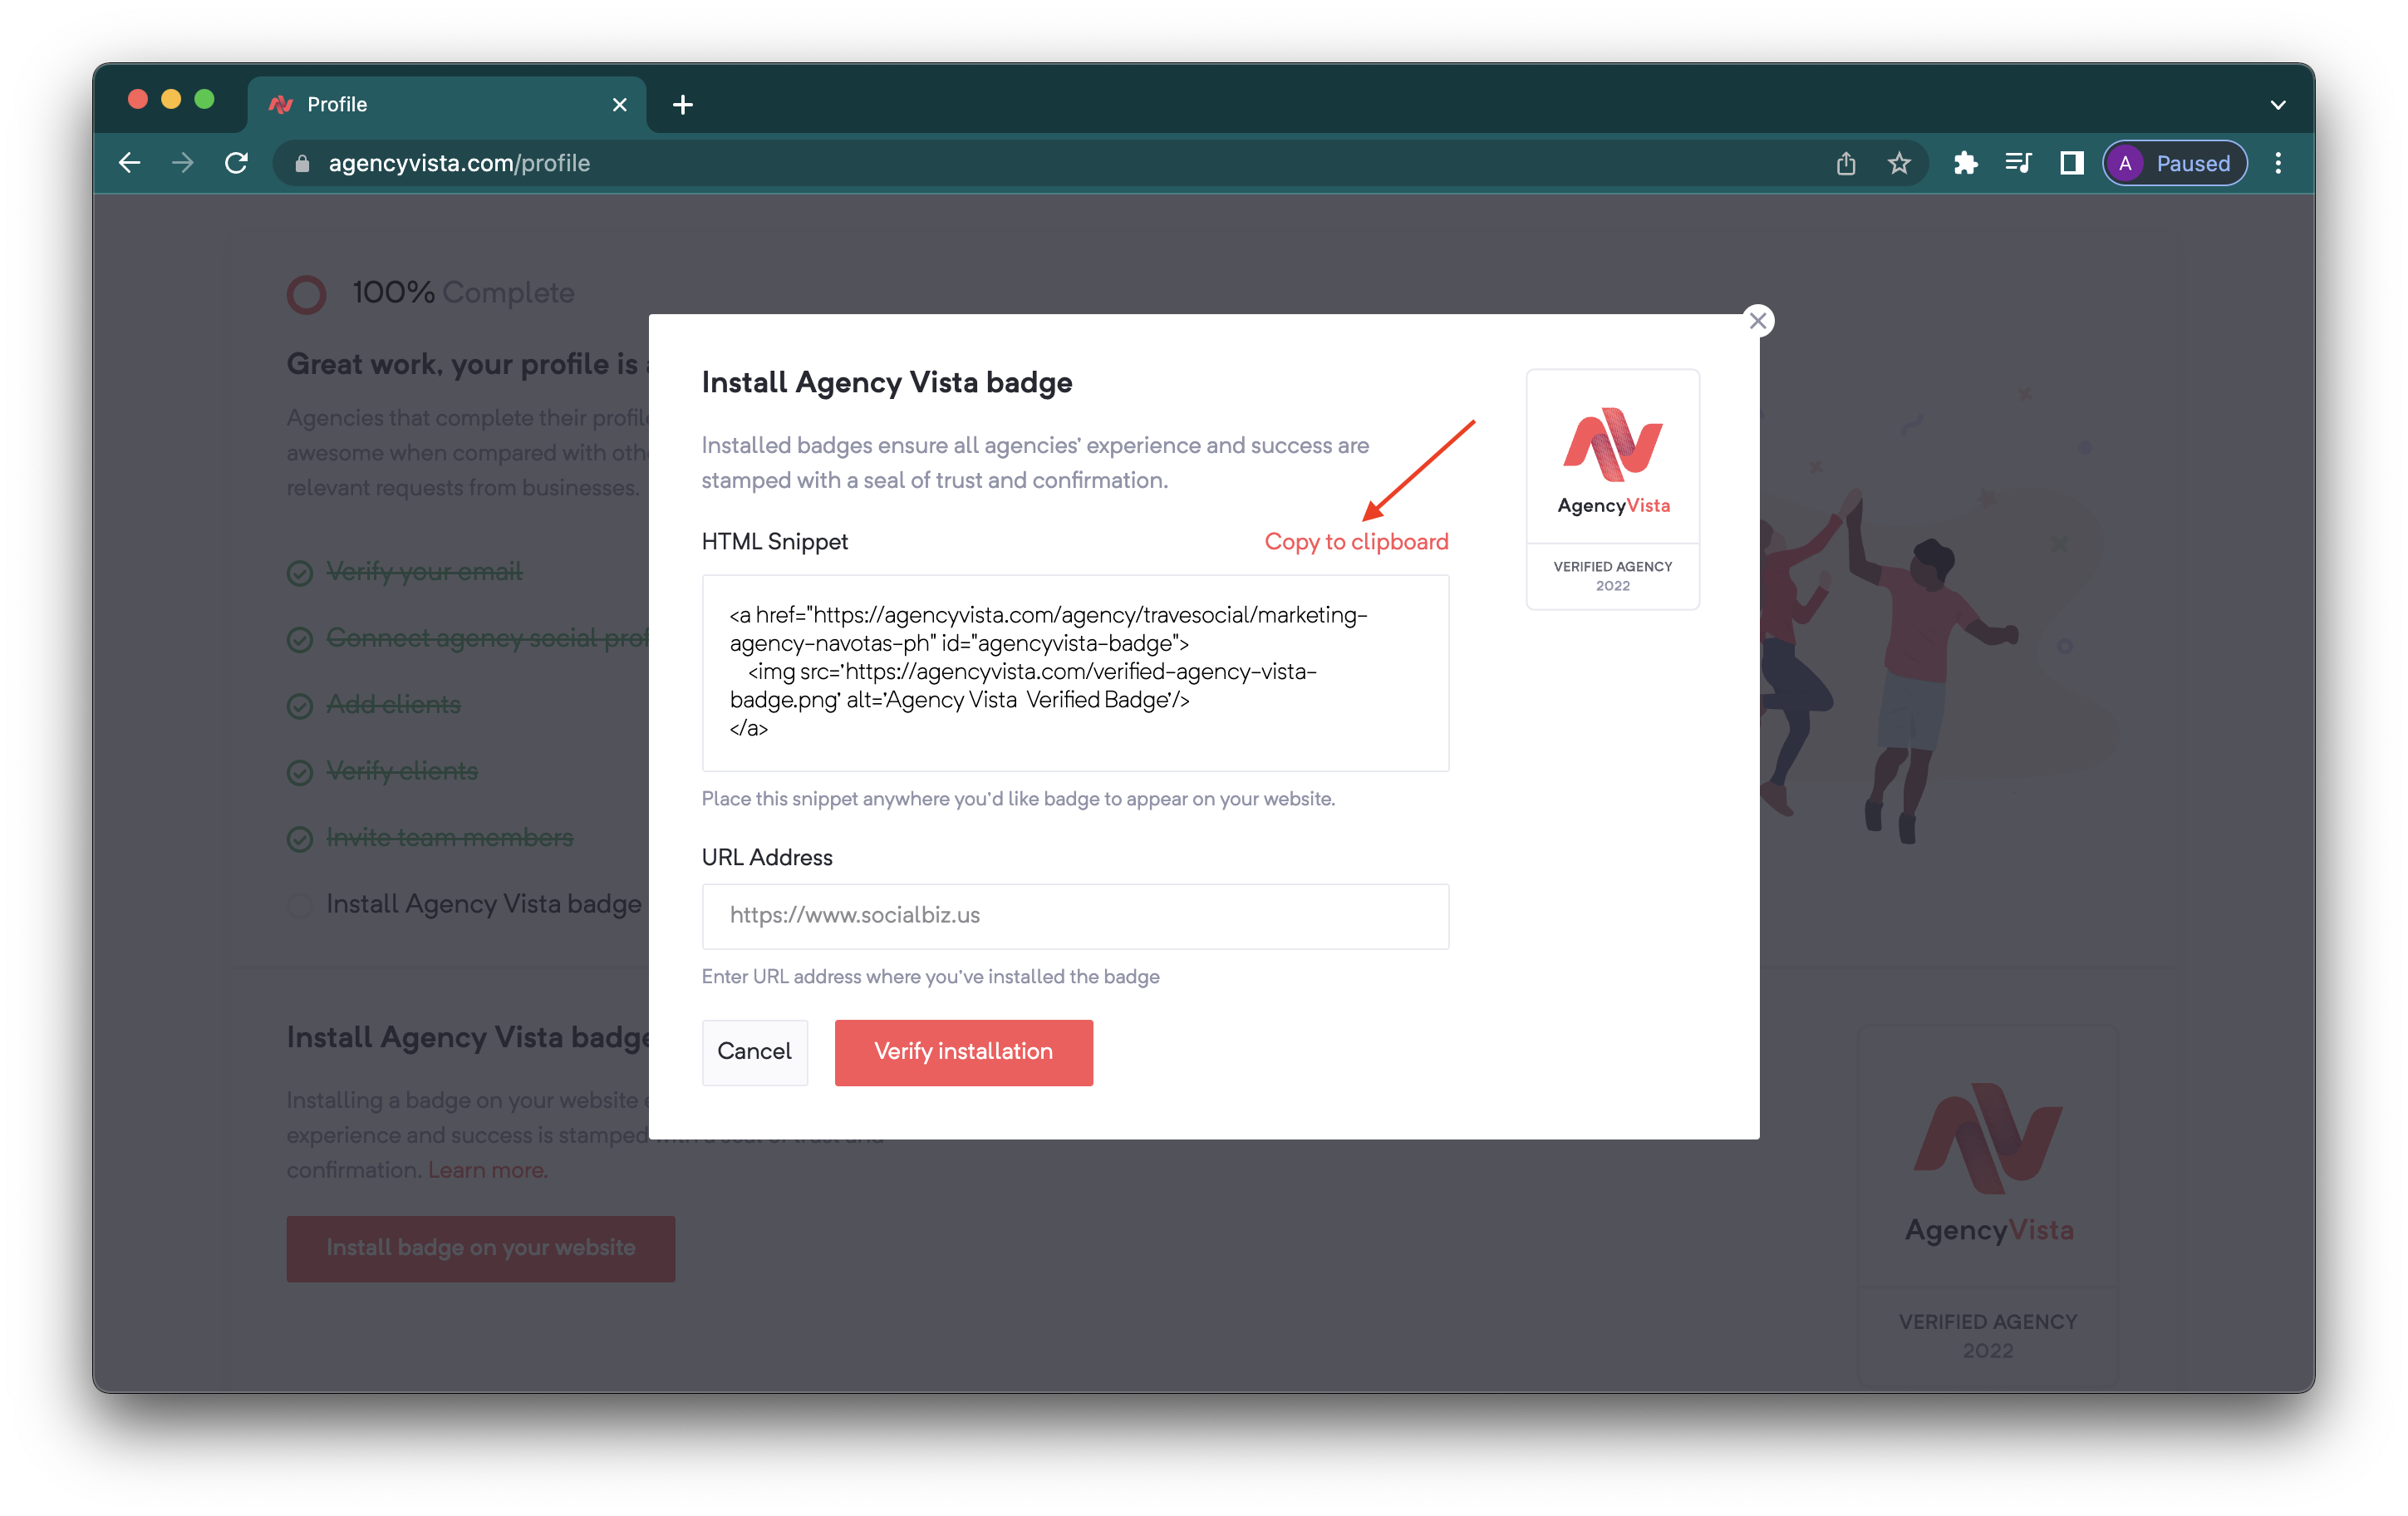
4. Once the code is added on your website, add the URL address of where you added the code and click Verify installation.
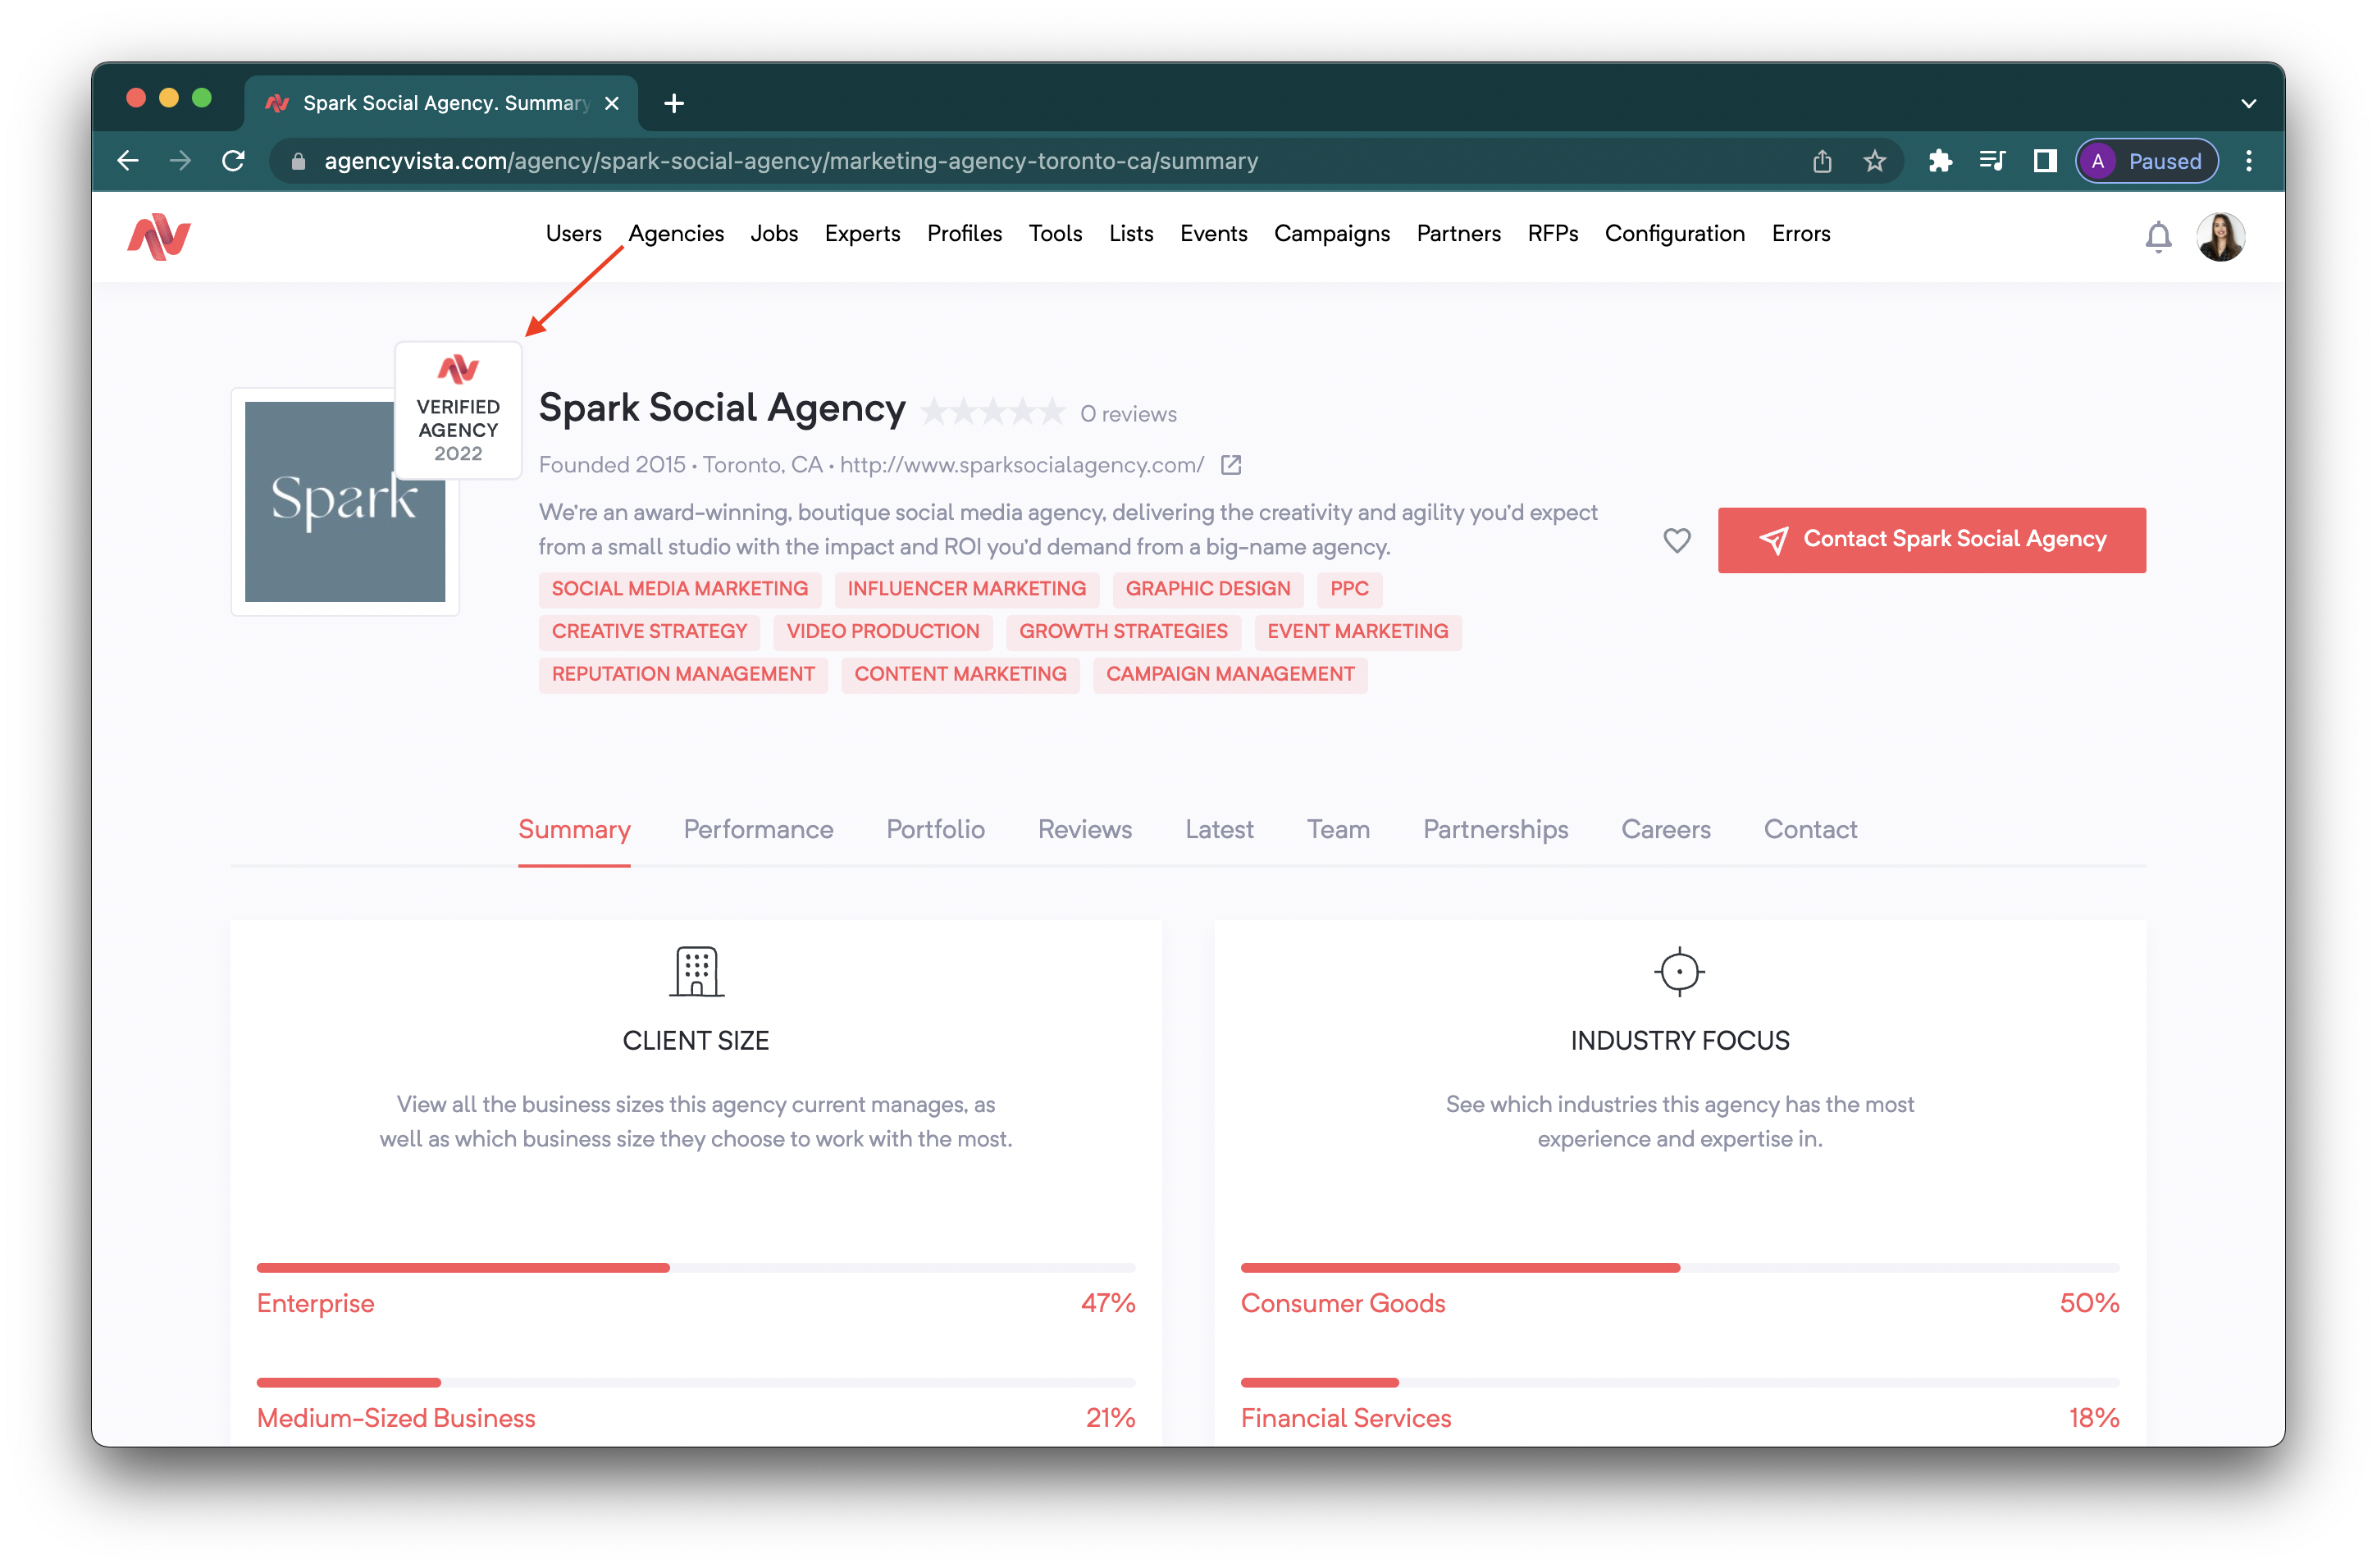
5. Once completed, the Agency Vista badge will now appear on your agency profile!
Check out this video to learn more about adding a verified badge on Agency Vista!
Comments
0 comments
Please sign in to leave a comment.